ScreenBeam Technology
What is ScreenBeam?
ScreenBeam Conference utility wirelessly connects the host device to the in-room peripherals and supports all major video conferencing tools.
To project and conference(Teams or Zoom) your device/screen, you will need to Install an application called: ScreenBeam Conference. The installation file is here:
J:\FM-IT\Software\ScreenBeam Conference\ ScreenBeam_Conference.msi
Once the software is installed, perform the following steps.
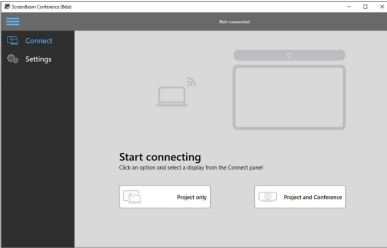
1) On the notebook, open ScreenBeam Conference from the Windows Start menu or the system tray
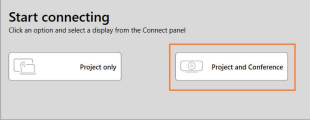
2) Select the Project and Conference option
3) Windows 10 or 11 Connect panel will appear showing a list of available devices
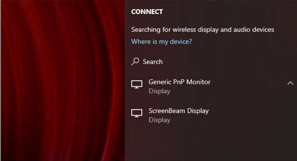
4) Select the device that matches the ScreenBeam receiver’s name as shown on the display.
5) The laptop will proceed and connect to ScreenBeam receiver.
6) Enter the PIN code to connect (the PIN is shown on the TV screen).
7) Once connected, the app will display the connection status (you may see the tutorial guide if it is the first connection).
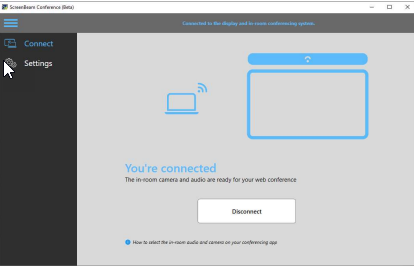
The laptop is now connected to the USB peripheral devices and in-room display!
At this point, you can start your conference in Zoom or Teams and the in-room camera and sound/mic will be used.